In today’s tutorial, I’m going to walk you through how to create an incredible 3D rotating clock animation using Alight Motion or After Motion Gate. This guide is perfect for those wanting to elevate their editing game using just their mobile phone. Make sure to follow step-by-step and grab the XML file from the description for ease.
💡 Tip: This tutorial is beginner-friendly and doesn’t require premium features if you follow along with the provided XML.
🎬 Step 1: Create a New Project in Alight Motion
-
Open Alight Motion or After Motion Gate.
-
Tap the “+” icon to start a new project.
-
Add a rectangle shape, go to Edit Shape, and stretch it to fullscreen.
-
Set the background color:
-
Go to Color Fill → Gradient
-
Set the base color to dark red.
-
⚙️ Step 2: Add Circles with Stroke and Shadows
-
Tap the “+” icon → Add a circle.
-
In Move & Transform → Scale, increase the size.
-
Disable fill color, go to Border & Shadow, enable Stroke:
-
Select Red Stroke, set stroke width to 15.
-
Enable Shadow, same red, and darken it.
-
-
Duplicate the circle layer twice and decrease each in size.
-
Adjust positioning and group all three into one.
🕰️ Step 3: Insert PNG Clock Layer
-
Tap “+” → Media, and import your clock PNG.
-
Resize and center it using Move & Transform.
-
Add a shadow effect for depth.
-
Apply 3D Rotation using:
-
Add Effect → 3D Rotate
-
Adjust Lighting Source, Y Rotation, and Depth to 9.
-
🧭 Step 4: Keyframe Animation
-
Go to 0.10s → Add keyframe for rotation and position.
-
Go to 1.10s → Add second keyframe.
-
Animate rotation, position (e.g., -41 Y, size 18, rotation Y to 3).
-
Use Graph Editor → 4th graph to smoothen animation.
-
Copy & Paste Graph to other keyframes for consistency.
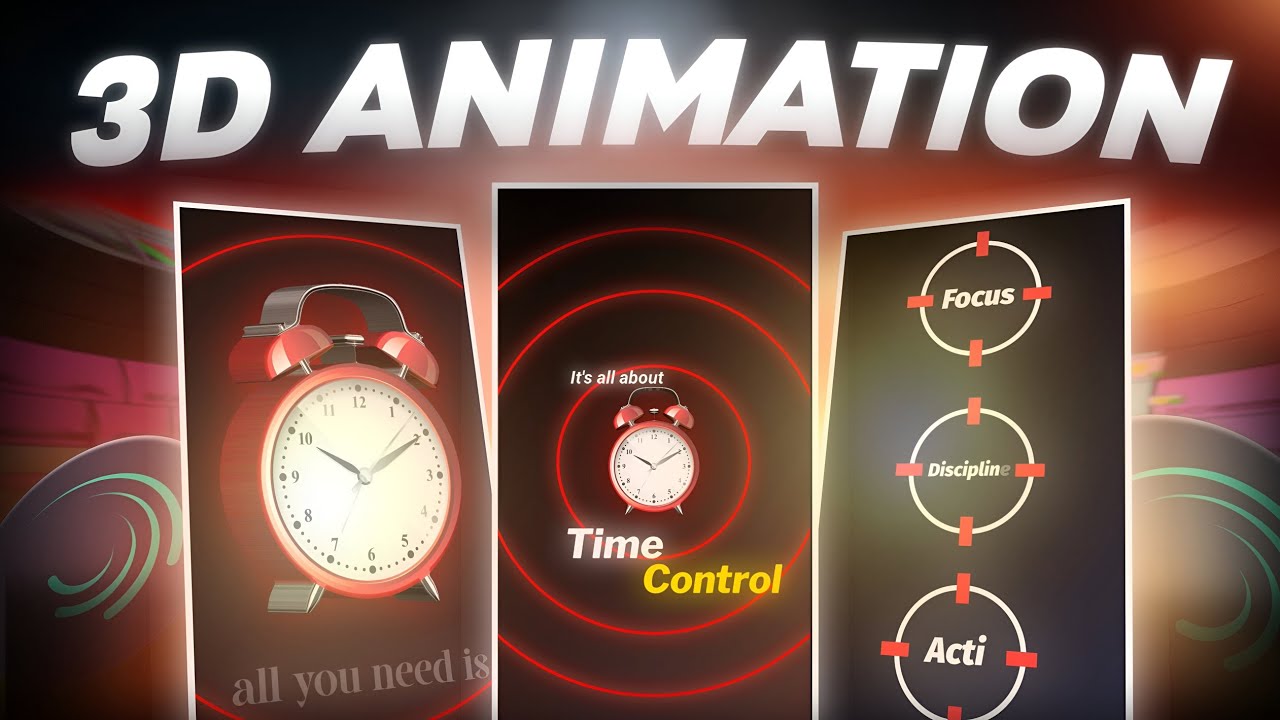
✍️ Step 5: Add Text – “It’s All About Time”
-
At 0.10s, tap “+” → Text → Write:
It’s All About. -
Choose a clean font, white color, and adjust scale.
-
Add Shadow (white) and apply entry animation using keyframes.
-
Repeat for text: “Time”, then “Control”, then “Focus”, then “Discipline”.
-
Position each text layer creatively with blur + transition animation using Gaussian Blur and keyframes.
🔄 Step 6: Add Zoom & Rotate Effects with Null Object
-
Add a Null Object via “+” → Object.
-
Connect all layers (except background) to the Null.
-
Add keyframes to Zoom In/Out using Z-axis.
-
Smooth the motion with Graph Editor (4th graph).
🔃 Step 7: Rotate the Clock
-
Select the Clock PNG layer.
-
Add keyframes from 3.10s to 4.15s, rotate it full circle.
-
Try different Graph animations to get smoother results (3rd or 4th).
🛠️ Step 8: Final Grouping & Cleanup
-
Group duplicate layers like circle outlines and text effects.
-
Adjust placement with Move & Transform.
-
Connect all to another Null Object for final zoom-out effect between 4s to 5s.
-
Play the animation to verify.
📦 Download the XML File
To make your work easier, I’ve created a ready-to-use XML project file that includes everything shown in this tutorial. You can download it directly from the link below:
👉 Download XML File (Google Drive)
(Note: Replace with your actual link)
📚 Related Resources & Tools
-
Get After Motion Gate (Third-party site, use cautiously)
🙌 Final Thoughts
This clock animation isn’t just eye-catching—it’s also a powerful way to learn about motion graphics on your phone. Whether you’re editing reels, shorts, or aesthetic edits, mastering this technique will take your skills to the next level.